
This is an updated (and slimmed down) article to the original one here.
Recording Your Golf Swing
Recording your swing from the proper angles is very important. Consistently filming your swing from the proper locations not only makes it easier for you to compare your swings against previous and future swings, but also makes it easier for others you might show your swing to (for example, to folks in the Member Swings forum or to an instructor) see what’s going on.
Two views are commonly used in looking at a golf swing. If you’ve watched golf on television, you’ll be familiar with them. They are the “Down the Line” view and the “Face-On” or “Caddie” view.
Here’s how to set up and record each. (Mentally replace the camera images with your iPhone 23 Pro if you don’t mind. 😀)
Face On (or “Caddie View”)
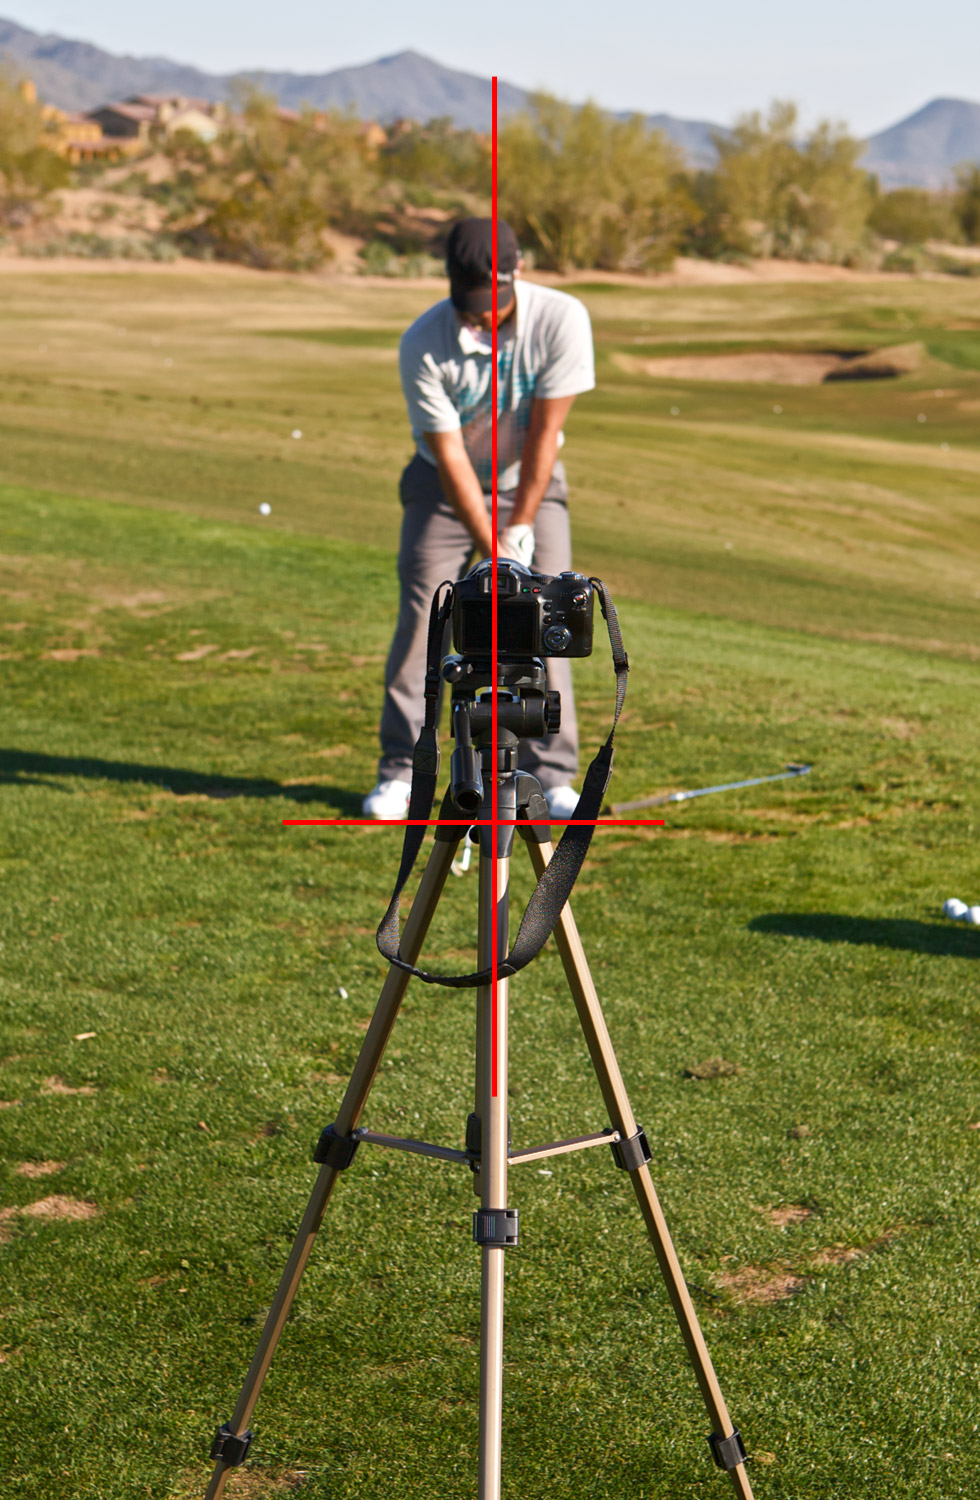
The Face-On or “Caddie View” video should be shot with a camera at roughly “hand height” (near the hips or a little bit lower than the belly button) square (perpendicular) to the golfer’s target line, and centered in the middle of the golfer’s stance. The golfer should likely be a bit lower than the center of the frame to allow for enough room above the golfer’s head to see the hands and at least a little bit of the shaft at the top of the backswing and enough room below the golfer’s feet to see the golf ball.
The camera should be between six to twelve feet from the golf ball. Too far away and not only will the golfer not fill the frame, but the shift in perspective makes some angles and positions tougher to see.
The best way to set the camera up for a Face On view is to use an alignment stick perpendicular to your target line in the exact middle of your stance. Set the camera right on that line, and the stick can double as a ball position aid as well.
The caddie view is illustrative in looking at the length of the golfer’s backswing, any movement side-to-side of his head, the location of weight at key positions, the low point of the club, and any casting of the club or flipping of the hands, among other things.
Down the Line
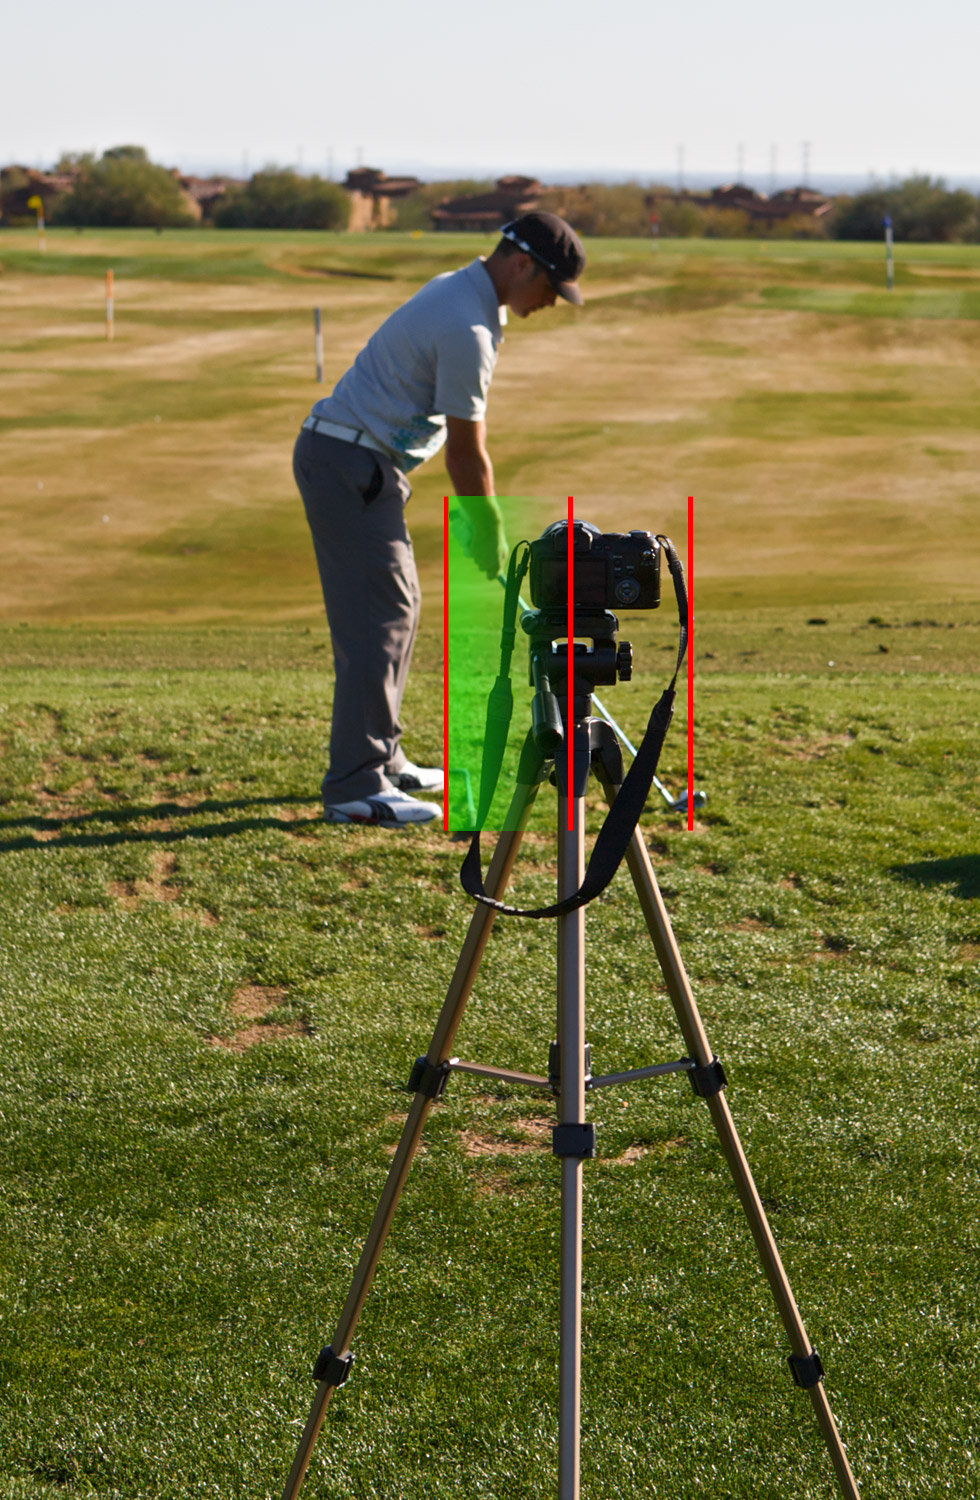
The Down the Line view is a bit trickier to set up consistently. Again, the camera should be at roughly “hand height.” Of course, rather than being square (perpendicular) to the target line, the camera should be aimed parallel to the target line, as illustrated by the three red lines above. The golfer should be in the left-center of the frame with a little room above his head and below his feet.
Though many are tempted to put the camera ON the target line out where the ball is, centering the ball in the video, this isn’t helpful as it puts the golfer completely to the side of the video, wasting resolution and providing a poor angle for almost every phase of the golf swing due to parallax.
The absolute best position for the camera shooting Down the Line video is parallel to the target line along the rear foot’s big toe – the left-most red line in the image above (and where the green shading is the brightest). A camera pointed parallel to the target line and halfway between the ball and the toes is acceptable but not ideal. Finally, a camera positioned directly behind the ball (the right-most red line) – regardless of how perfectly parallel it may be to the target line – is not very helpful at all as it will distort almost every phase of the golf swing (including the position of the club shaft and head).
The camera should be between eight to twelve feet from the golf ball. Too close and things may be distorted as the club’s arc can get awfully close to the camera during the backswing and downswing.
Yes, if your stance is slightly open or closed, both sets of toes won’t be on the line of the camera. That’s fine, and in fact helpful, as many players have slightly open or closed stances. The best way to set the camera up for a Down the Line view is to use an alignment stick just in front of your toes, parallel to the target line, and to set the camera just inside that stick line.
The down the line view is illustrative of a golfer’s swing plane, his shoulder pitch at the top of the backswing, his setup and balance, his trail knee and footwork, and his head and butt positions, among other things.
Importance of Consistency
Framerates on Modern Technology
Most people have a brilliant camera in their pockets, as the modern smart phone can record HD video at 120 or 240 or even higher frames per second.
For all but the shots or situations listed below, we recommend that you record video at about 200-300 frames per second. Any less and you’ll miss subtle movements and you could miss impact by several inches. Any more and, unless you’re really looking to document something very small or intricate, and you’re just taking up more space and making playback take much longer than necessary. We also recommend recording in at least 720p video, with little need for 4K video at any frame rate (unless you’re recording a swing to print out at a large size or something!). The golf swing is, after all, a fast-moving thing with little time to stop and appreciate the pixels. (This recommendation will likely be outdated several years from now, as technology continues to advance, though there are limits to what the human eye can perceive, too.)
Situations in which you may want to scale back the frame rate include:
- When you’re looking to see the “rhythm” or “flow” of a shot.
- Shorter shots like pitches, chips, etc. which have rhythm/flow but which also have less overall intricacy, and less speed.
- Beginner golf swings with larger, more obvious errors (120 or even 60 FPS is often plenty).
- When you’re trying to save disk or storage space. We still record videos at 240 FPS, but with lower resolution than HD because we record thousands of swings per year and the file sizes add up quickly.
Lighting
GOOD lighting is important. Though a camera recording at 240 FPS could have a “shutter speed” or “exposure time” of each frame of up to 1/240th of a second to properly expose the image in each frame, more light allows the shutter speed/exposure time to be much shorter.
We installed several lights in our academy to record video at 1/1000th of a second, which is very nearly the bare minimum shutter speed we recommend. Outdoors, even on a cloudy day, modern cameras are able to achieve 1/1000th or faster quite easily, but indoors some individuals will have a hard time getting 1/500th or so.
Why is this important? Because at higher shutter speeds, not only do we see the smaller motions, but objects are less blurry. If you’re trying to look at the leading edge of the clubface at A6/P6, you’ll see it pretty clearly at 1/2000th of a second, and you’ll barely be able to tell where the clubhead is at 1/500th, let alone make out the leading edge.
Get a Tripod
 In addition to a camera, there are a few other accessories you may want to buy.
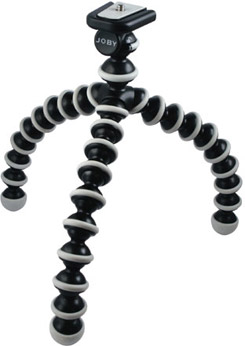
Some sort of tripod, or a phone clip that attaches to an alignment stick, are absolute musts. Your tripod could be anything from the $30 Gorillapod (shown at right), which can attach to a push cart, a golf car, your driver, etc. to a more expensive tripod. If you’re in a pinch, search the Internet for “bottle cap tripod.”
The purpose of a tripod? There are two. The first is to keep your video stable, so that any movement you see is due to the movement you’re doing, not the camera person moving as they record your swing. Second, and perhaps most importantly, to get the proper angles, particularly height. Without a tripod, many will resort to recording swings by setting their phone on the ground.
GolfPod 2.0
TST would like to point you at the GolfPod 2.0 (getgolfpod.com). A few staff members have the GolfPod, a small but sturdy portable tripod for recording your golf swing, and we’re sharing our thoughts in this topic on our forum. We invite you to join us there, where you can start your own Member Swing topic to discuss and get help with your golf swing. We only insist that you film from the right camera angles! 🙂
In the down the line view, how do you verify that the camera lens is perpendicular to the target line, toe line, etc.? In other words, I can see how it is easy to make sure the camera is at the correct height, and also at the correct point between the target line and the golfer’s toe line (or thigh line or whatever). However, if the camera is rotated a few degrees, it would change the views similar to how changing the position of the camera changes the views in your video demonstration here.
Correction — meant on the golfer’s trail foot toe line, not between the toe line and target line.
Thanks for this article. The picture showing how to set up dtl is very useful!
Great article – you could set this up yourself!
I have looked at professional services as well.
-JPB: didn’t know this fancy fact until recently but the issue you’re describing owes to parallax error, a distortion between what our eyes see and what the camera lens sees. The smaller the lens, the more the effect is magnified. To shoot swing videos on my iPhone SE 2020, I bought an app(ProCam 7) that enables balancing the lens in two dimensions. It’s not perfect, positioning the camera is still difficult, but it does help reduce the effect.
Do you have any software recommendations? In my iphone settings I only have 30 or 60 fps rates. Some web searching sugggests that “Coaches Eye” used to be able to record at 240, but since Sept 2021 this is no longer available. If you’re recommending 200-300 fps, but that isn’t natively available it would be useful to know if there is third party tooling to accomplish this.
I have an iPhone SE 2020 and use ProCam 8 to record golf swings, mainly because it allows shutter speed to be manually set. Higher shutter speeds is the key to recording club motion as anything but a blur. The fps can be set as high as 240 but I shoot at 720p60 because more frames don’t provide any more information but take longer to step through. I know little about cameras and photography so the UI was challenging to learn but the effort has been worth it.